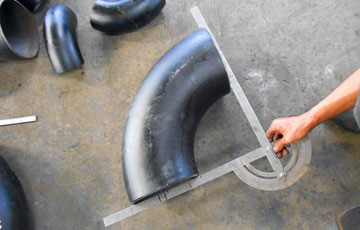
The most regular NDT methods are as follows:
Penetrant Testing:4xac
Penetrant solution is applied to pipe fittings or flanges cleaned surfaces.The liquid is pulled into cracks or defects by capillary action.Excess penetrant material is carefully cleaned from the surface.A developer is applied to pull the trapped penetrant material back to the surface where it is spread out and shows an indication.This indication is much easier to find than the crack or defect.
Magnetic Particle Testing
A magnetic field is established in a pipe fitting made from ferromagnetic material.The magnetic lines of force travel through,exit and reenter the material at the poles.Defects such as crack or voids cannot support as much flux,and force some of the flux outside of the part.Magnetic particles distributed over this pipe fitting will be attracted to areas of flux leakage and shows a visible indication.
Ultrasonic Testing
When the quality checker use a transducer to send the high frequency sound waves to a pipe fitting or flange. The waves travel through the product and are received by the same transducer or another one. The amount of energy transmitted or received and the time of the energy is received are analyzed to determine the presence of flaws. Changes in material thickness and properties could be measured too.
Eddy Current Testing
The Eddy current testing is used a lot as the NDT method for seamless steel pipes. Alternating electrical current is passed through a steel pipe producing a magnetic field. When the pipe is placed closed to a conductive material, the changing magnetic field induces current flow in the pipe. These currents travel in closed loops and are called eddy currents. Eddy currents produce their own magnetic field that can be measured and used to find flaws.
Radiographic Testing
Our QC team use RT to check the quality of welded seam. They put the radiation source and detector on the two sides of the seam, and use X-ray to produce images of welded seam from film or other detector that is sensitive to radiation. The thickness and density of the welded seam that X-rays must penetrate affects the amount of radiation reaching the detector. This variation in radiation produces an image on the detector that often shows internal features of the test seam.
MT inspection in steel piping industry
Magnetic Particle Inspection (MPI) could be used to test weld seams, steel pipe fittings and forgings for surface or subsurface defects. It is a important NDT (Non-destructive testing)method, similar with PT inspection,but it can only be used on ferromagnetic metals.Magnetic Particle is also known as MPI Magnetic Particle Inspection,magnetism checking.
Magnetic Particle is a fairly quick low-cost NDT method compared to others such as Ultrasonic testing, Eddy Current and X-Ray testing.The principle of Magnetic Particle testing is quite simple,the main concern is ensuring that the pipe fittings are adequate for the application. The inexperienced workers just need short time training for the MT inspection.
Most codes require magnetism coverage in two directions to cover 100% of the part. In order to achieve this you need to understand the equipment that you are using; as well as, the direction of the magnetic field, amperage and number of turns that you are using. If you do not know and are currently performing magnetic particle you are probably missing flaws during your inspections.
In our factory, quality checkers use the MT inspection on the pipe fittings especially the tees and reducers which are likely to bring some cracks and defects on the surface. Except the forming, heat treatment and MT inspection is necessary steps in the production.
PT (Penetrant testing ) inspection in steel piping industry
Penetrant testing is a very important and popular inspection method in steel pipe fittings and flanges production.
The steel pipe fittings and flanges are mostly produced by forming method which could have some cracks or defects in production.Suitable heat treatment should be done for such shape forming,but it may still have some cracks or defects.Then the PT inspection is necessary for quality checking, before the checking,QC have to do some proper cleaning and assure that surface contaminants have been removed and the surface is clean and dry.

